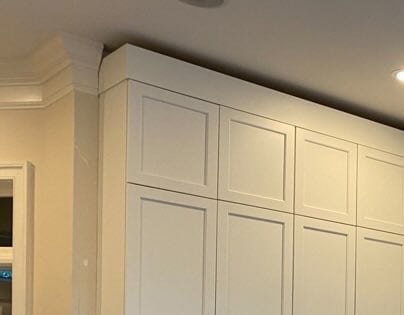
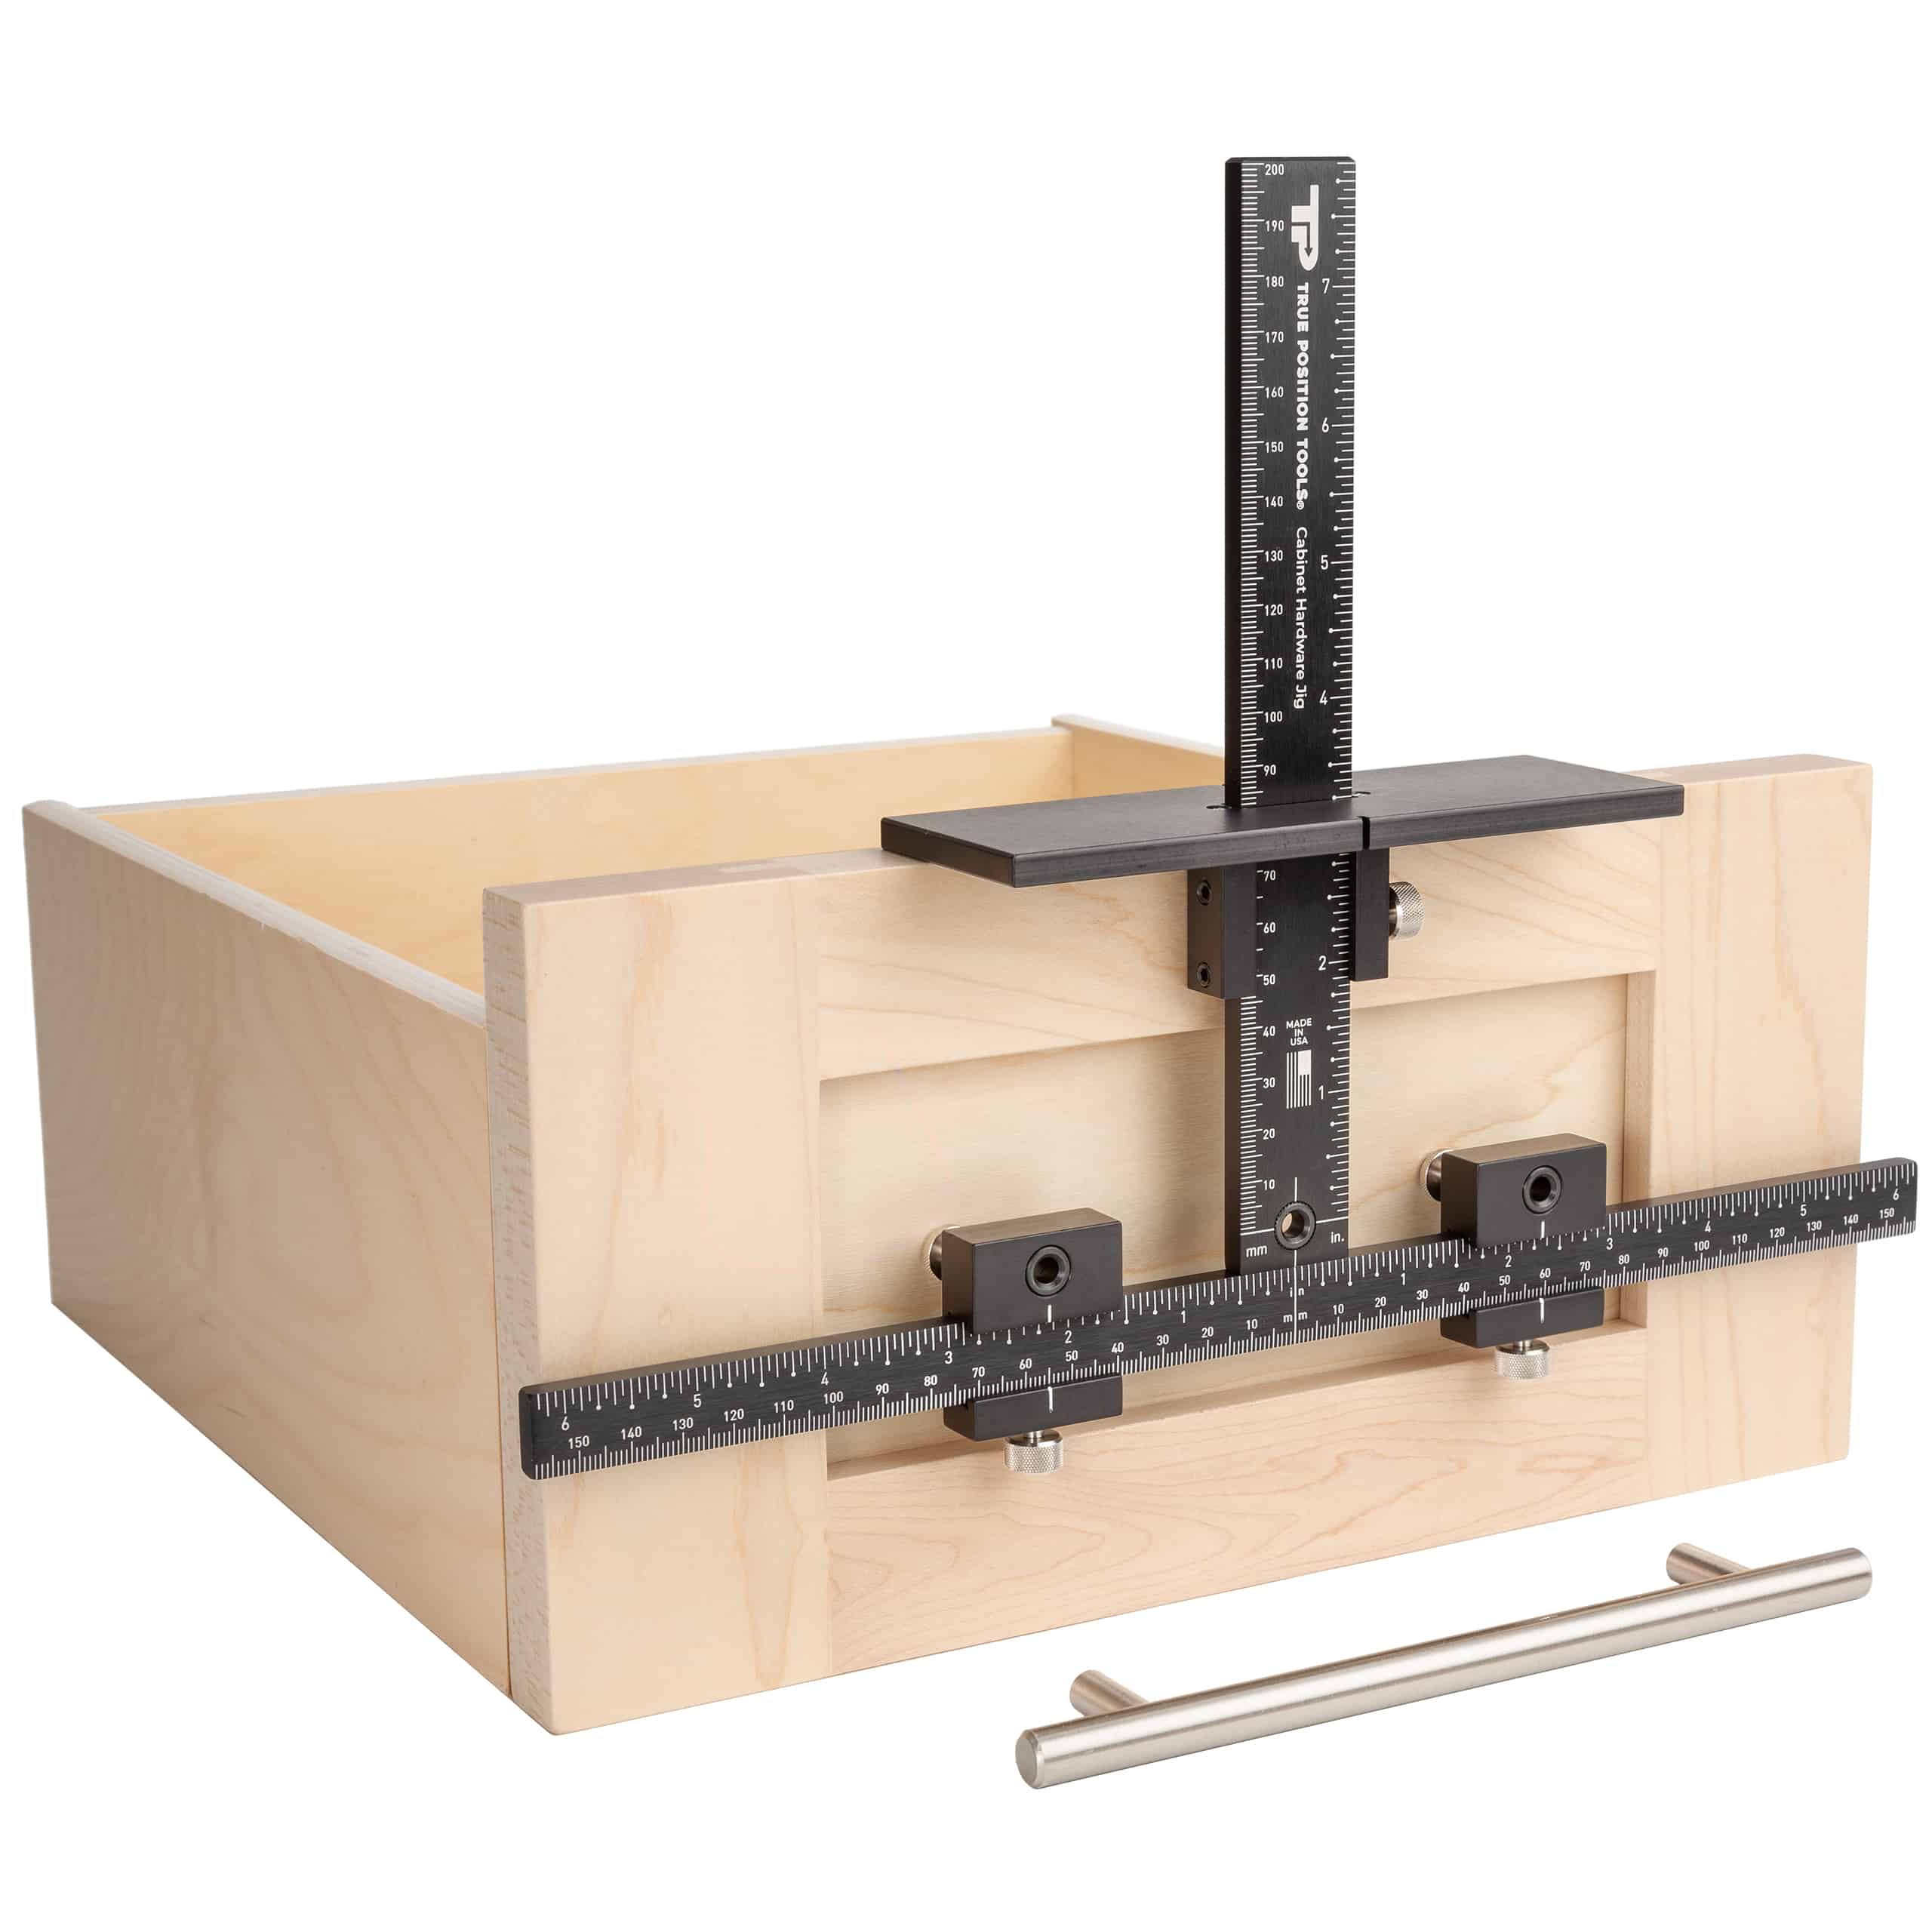
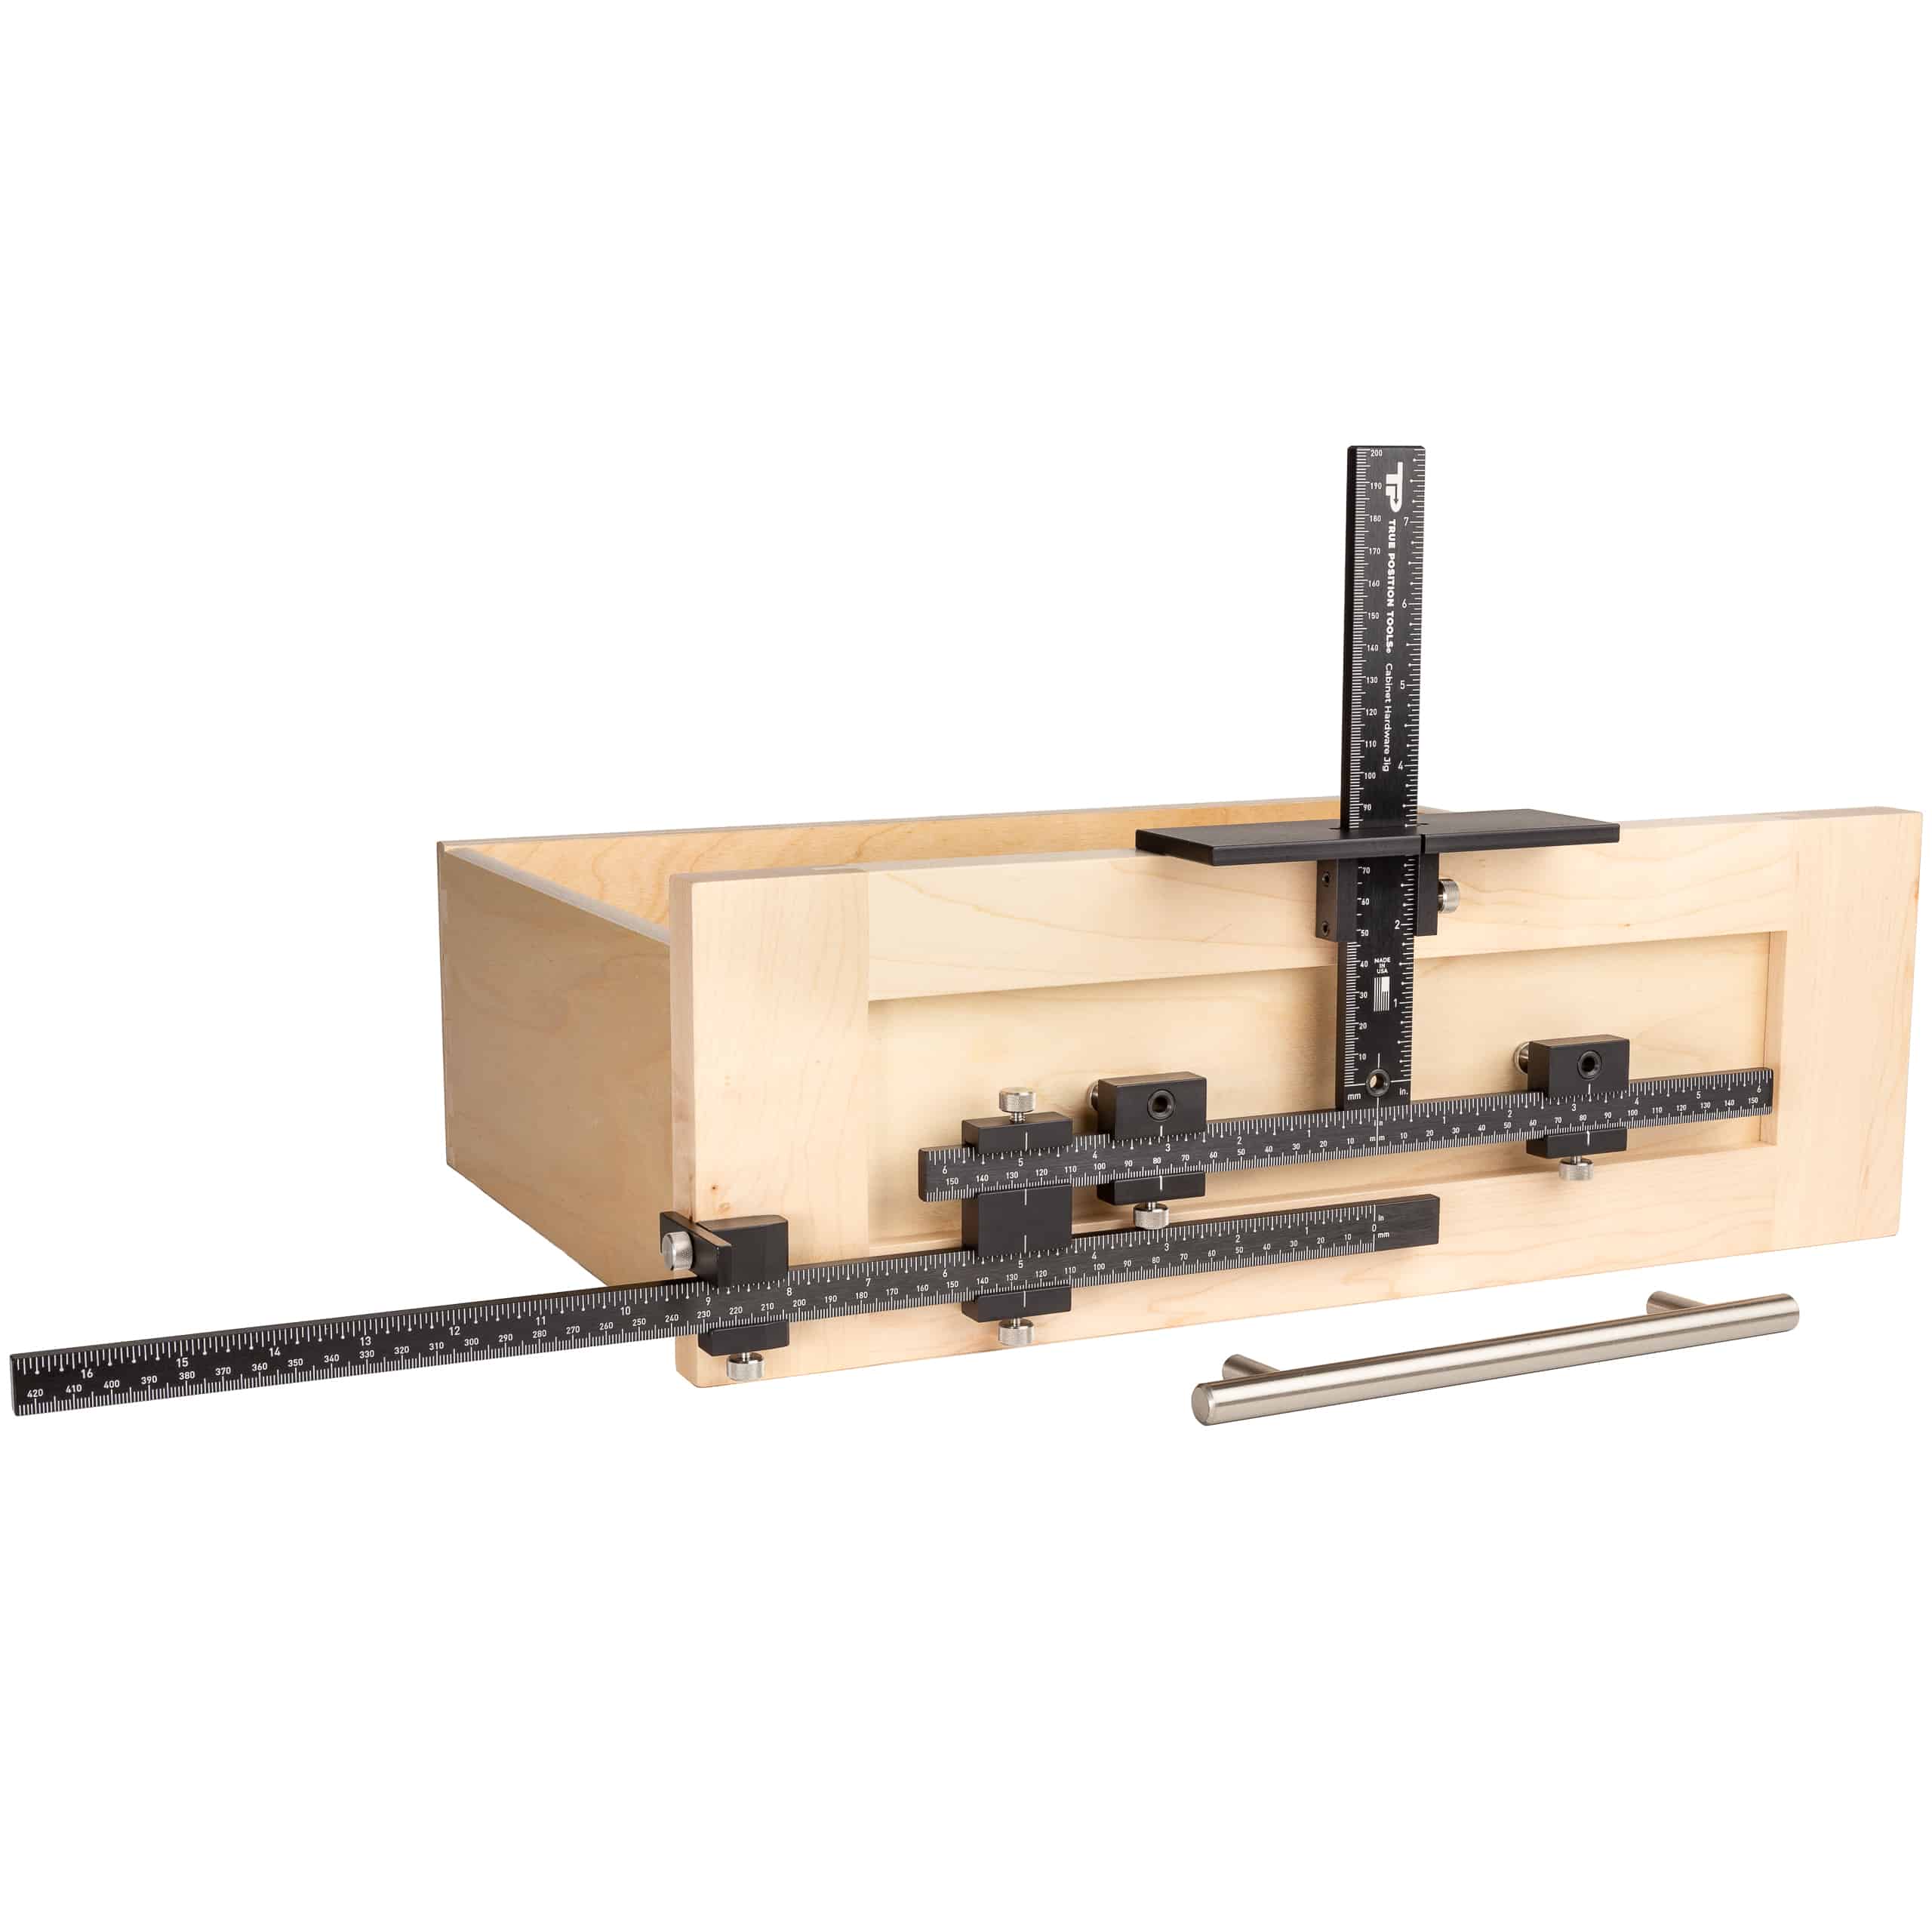
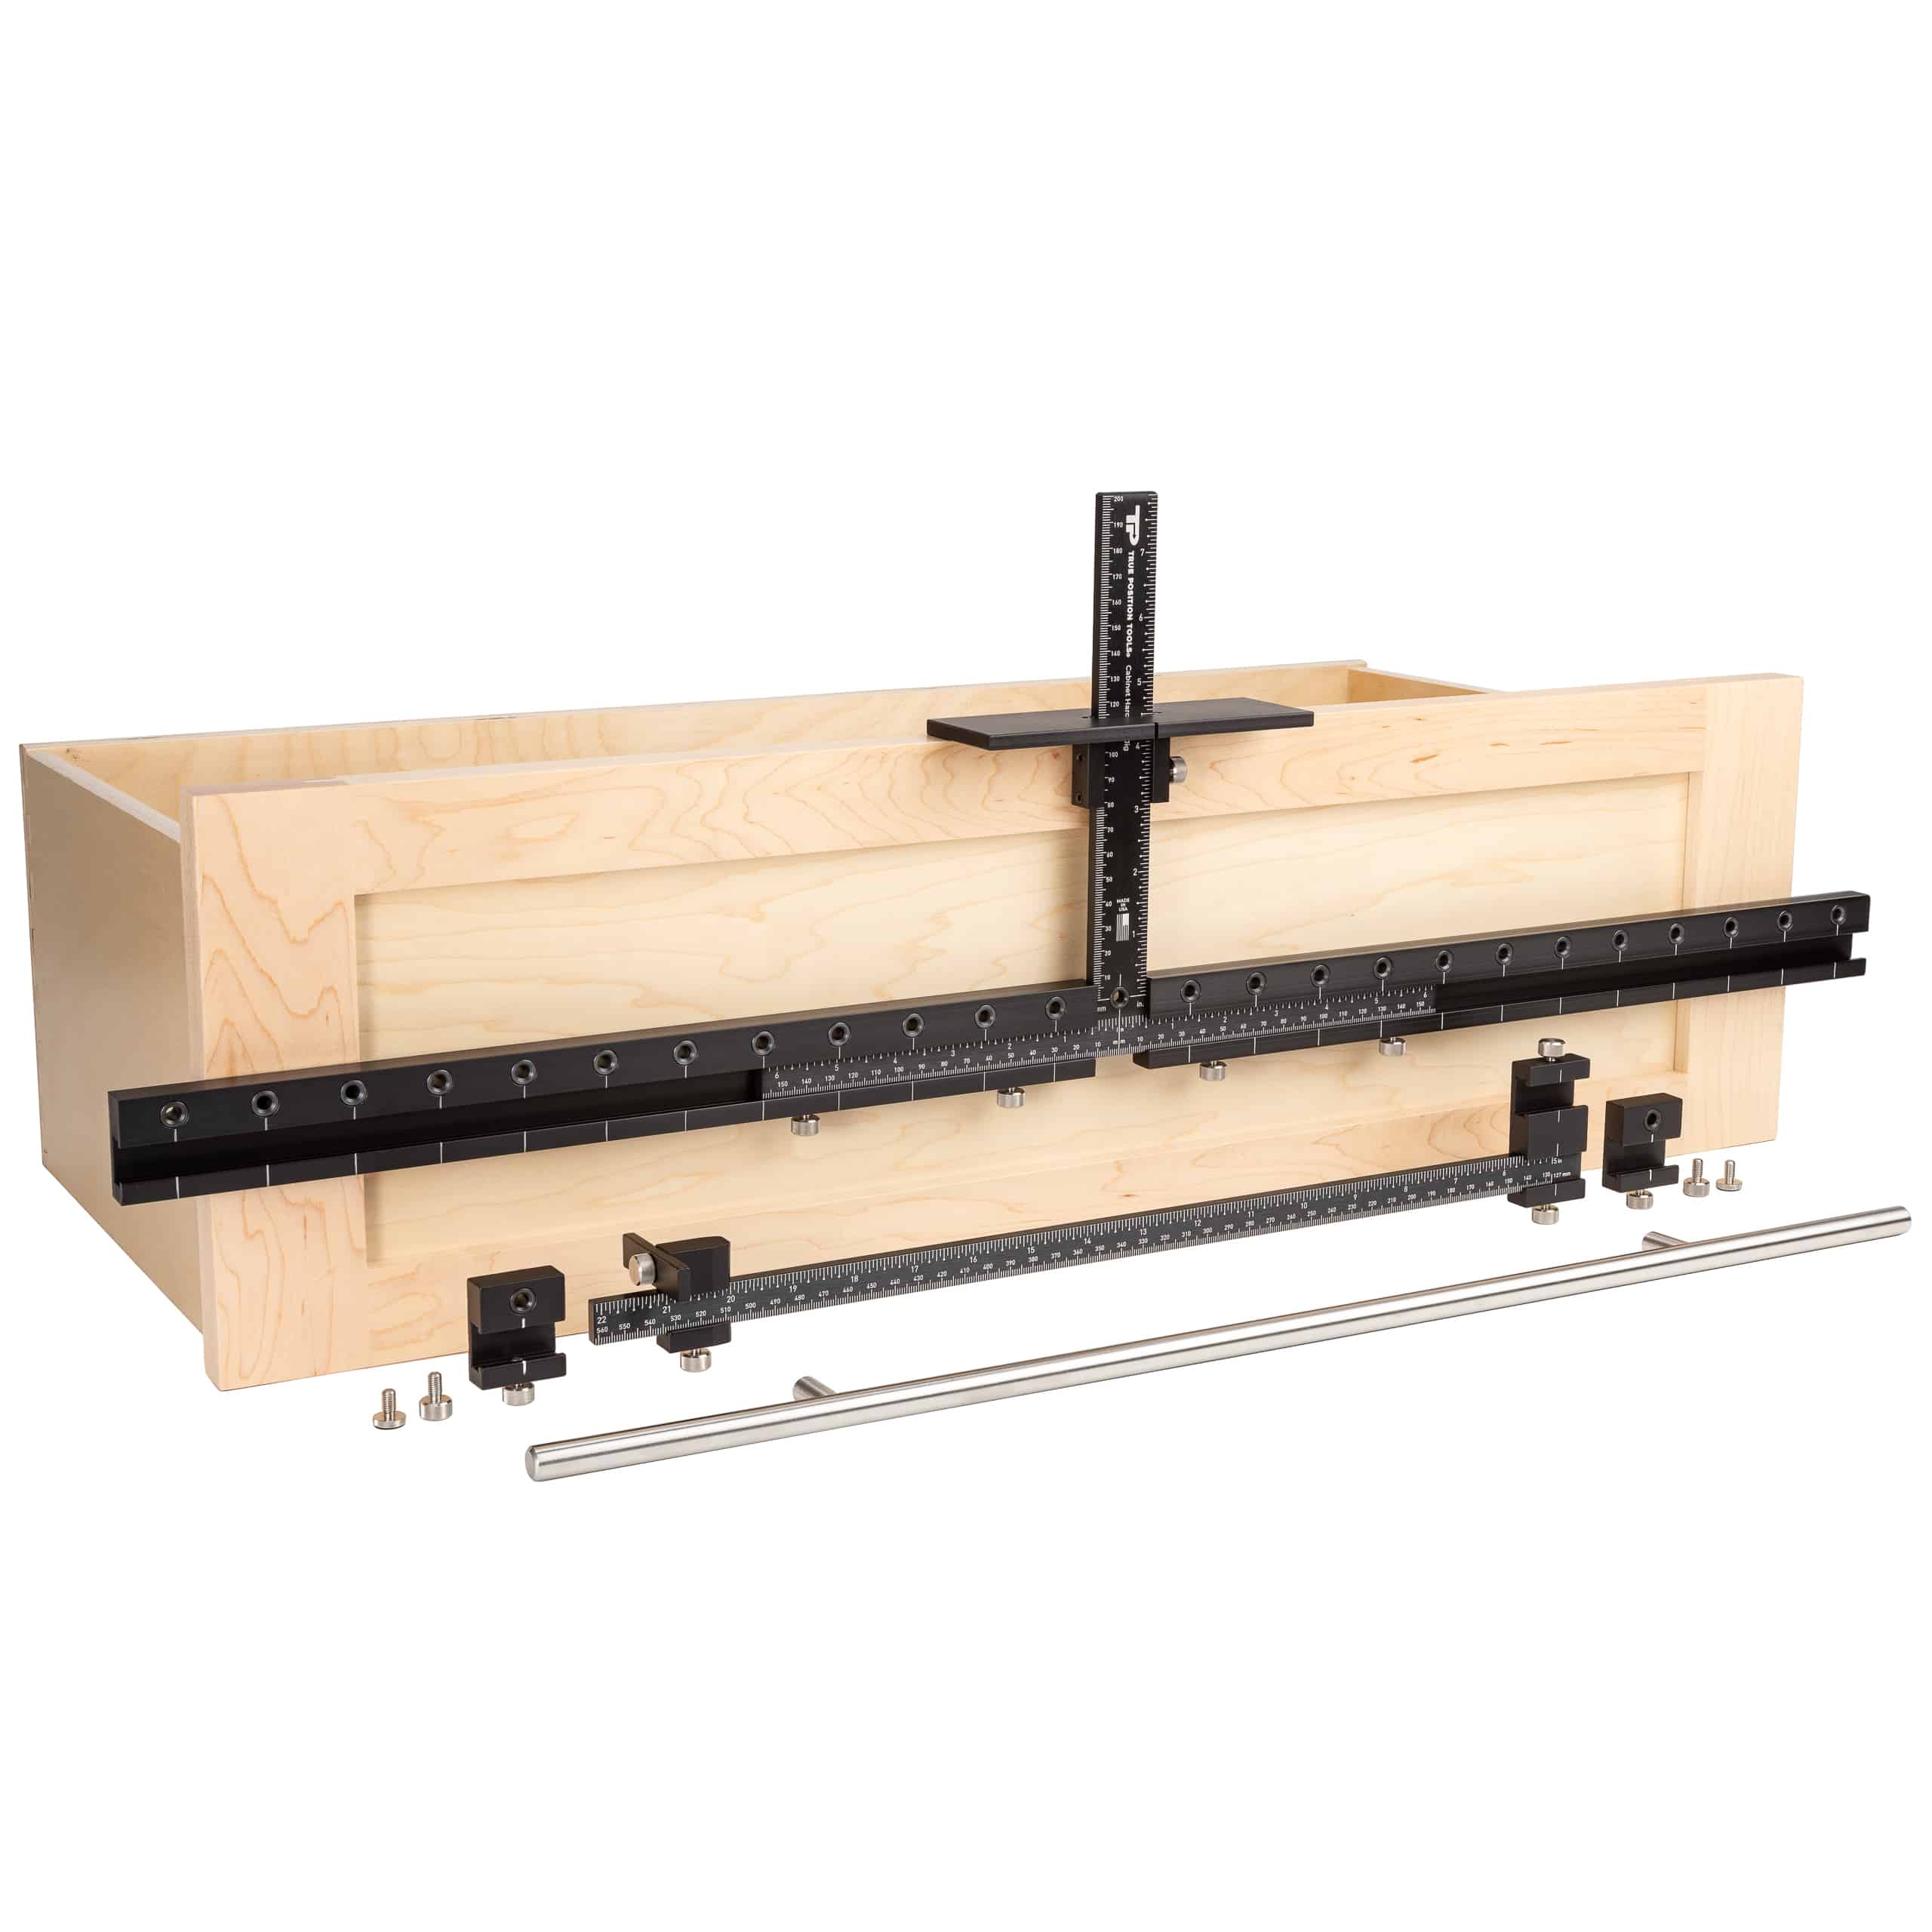
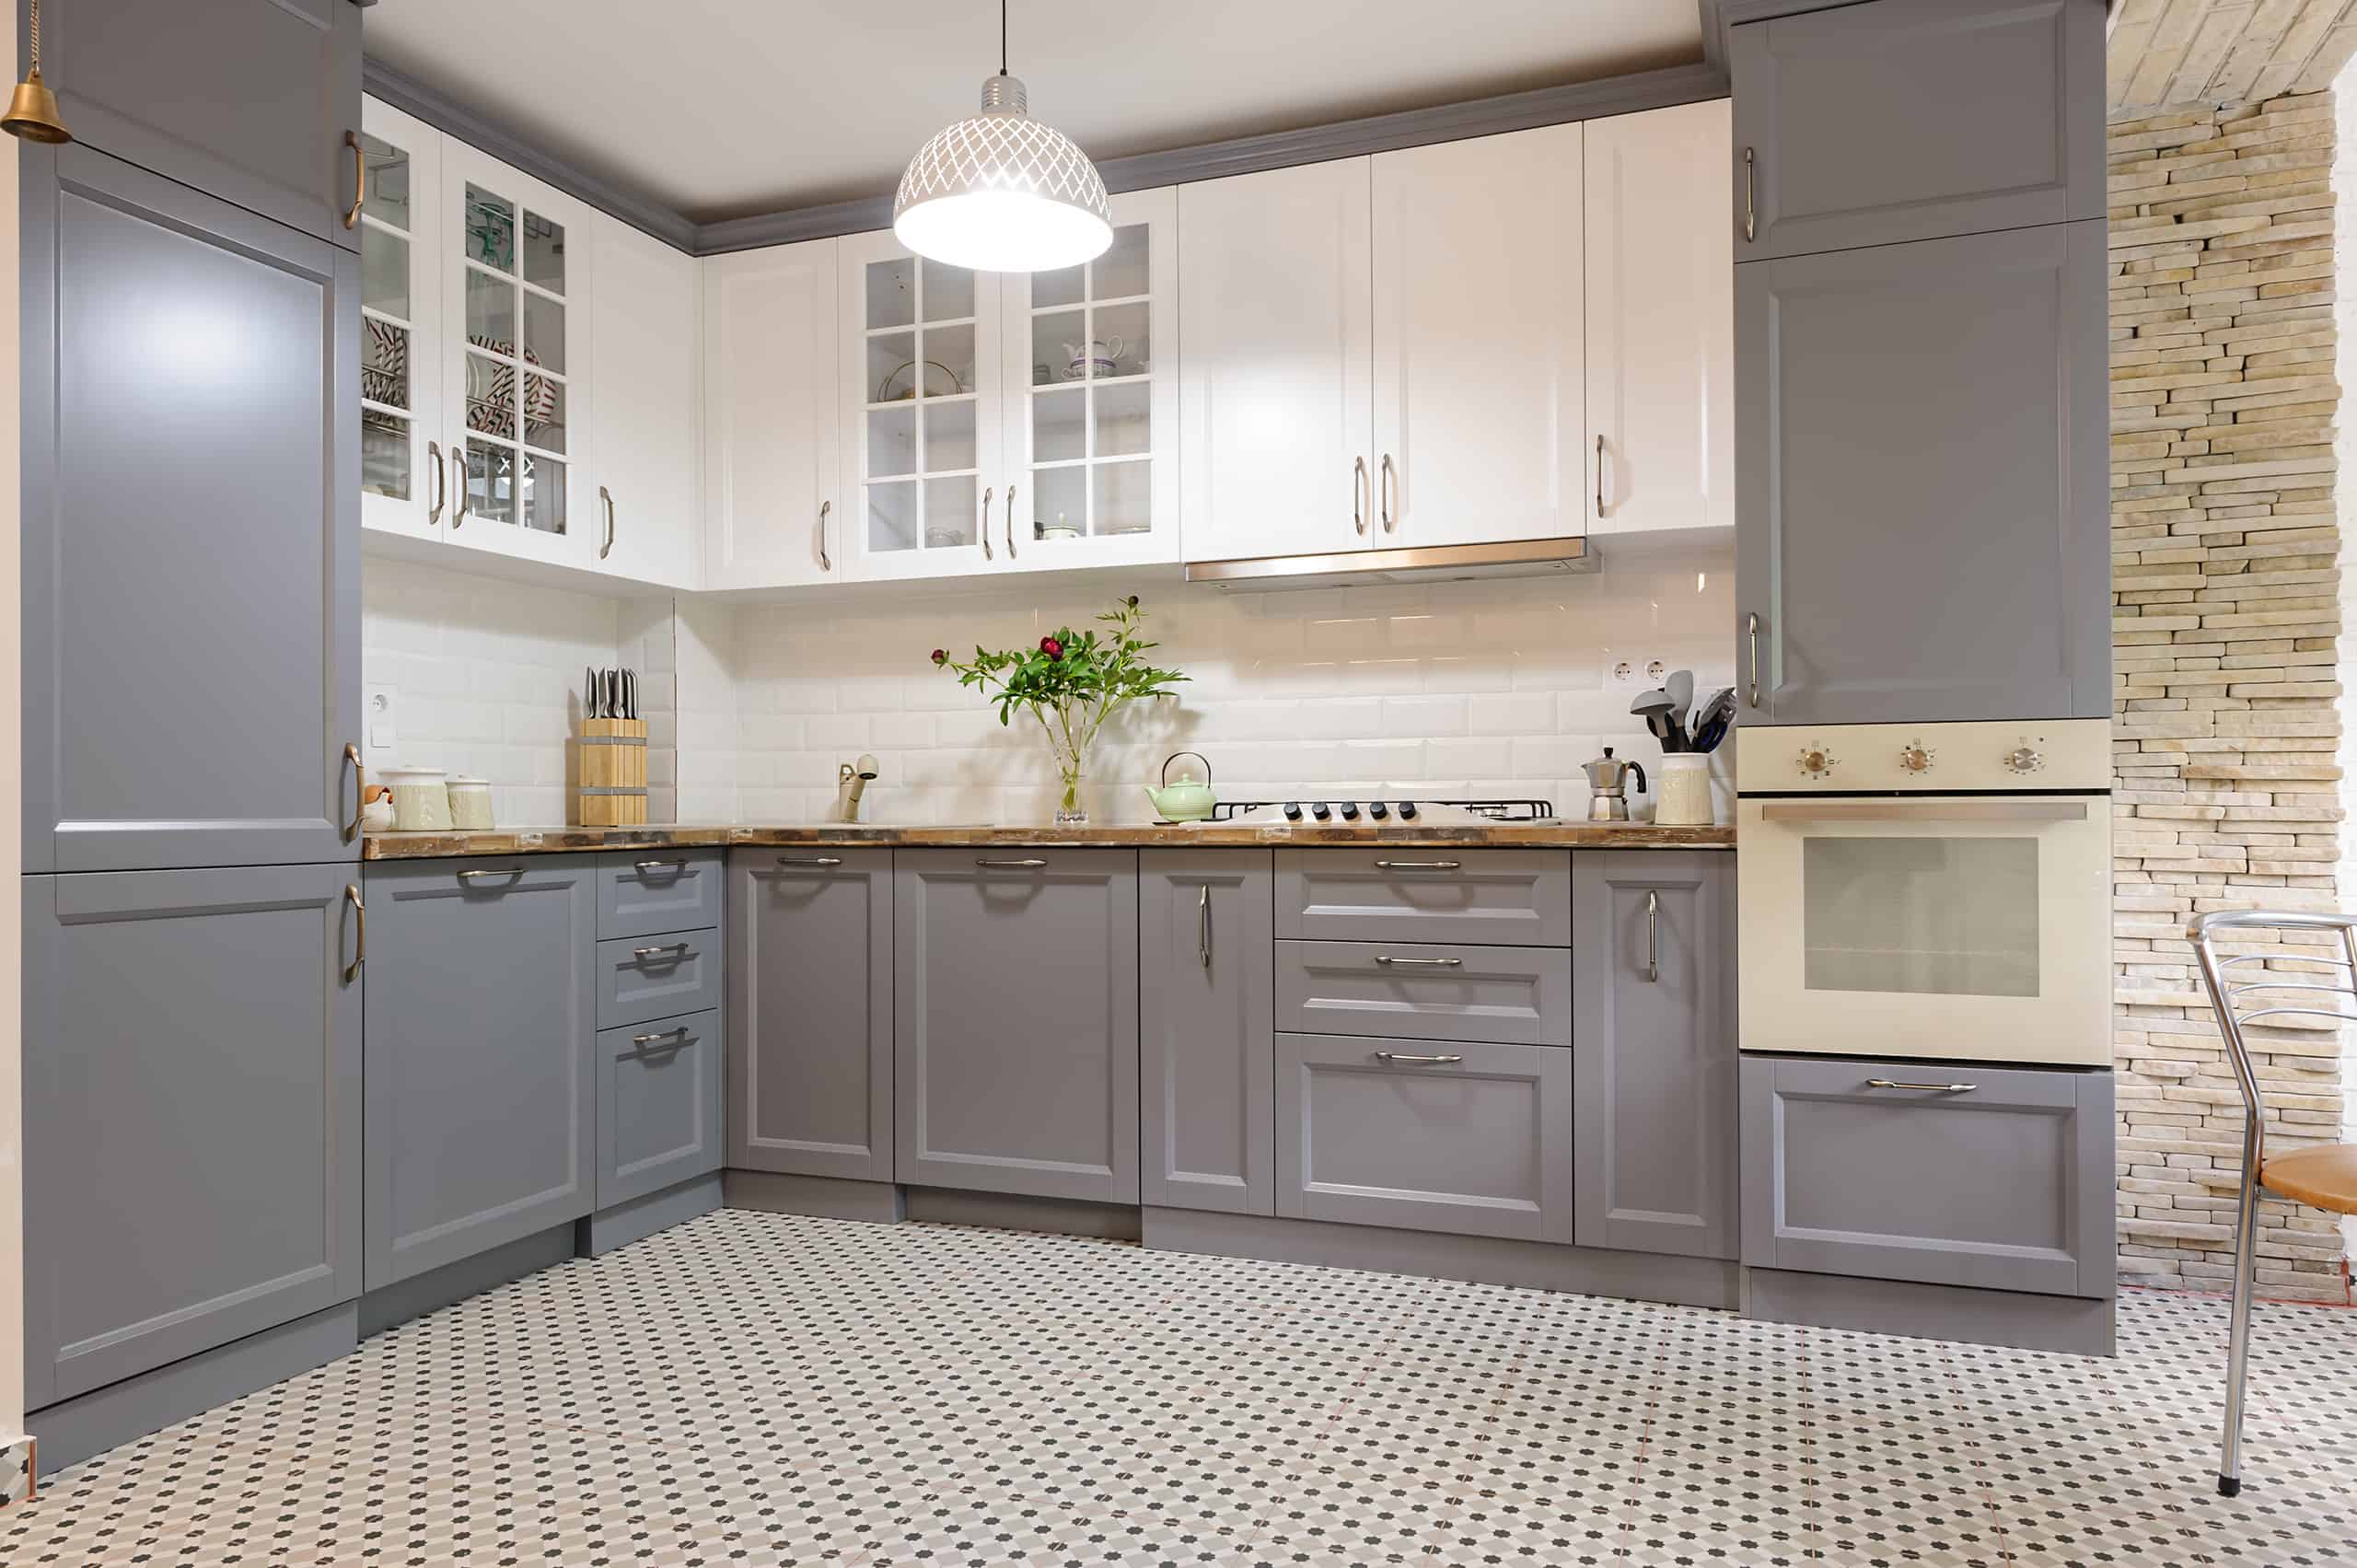
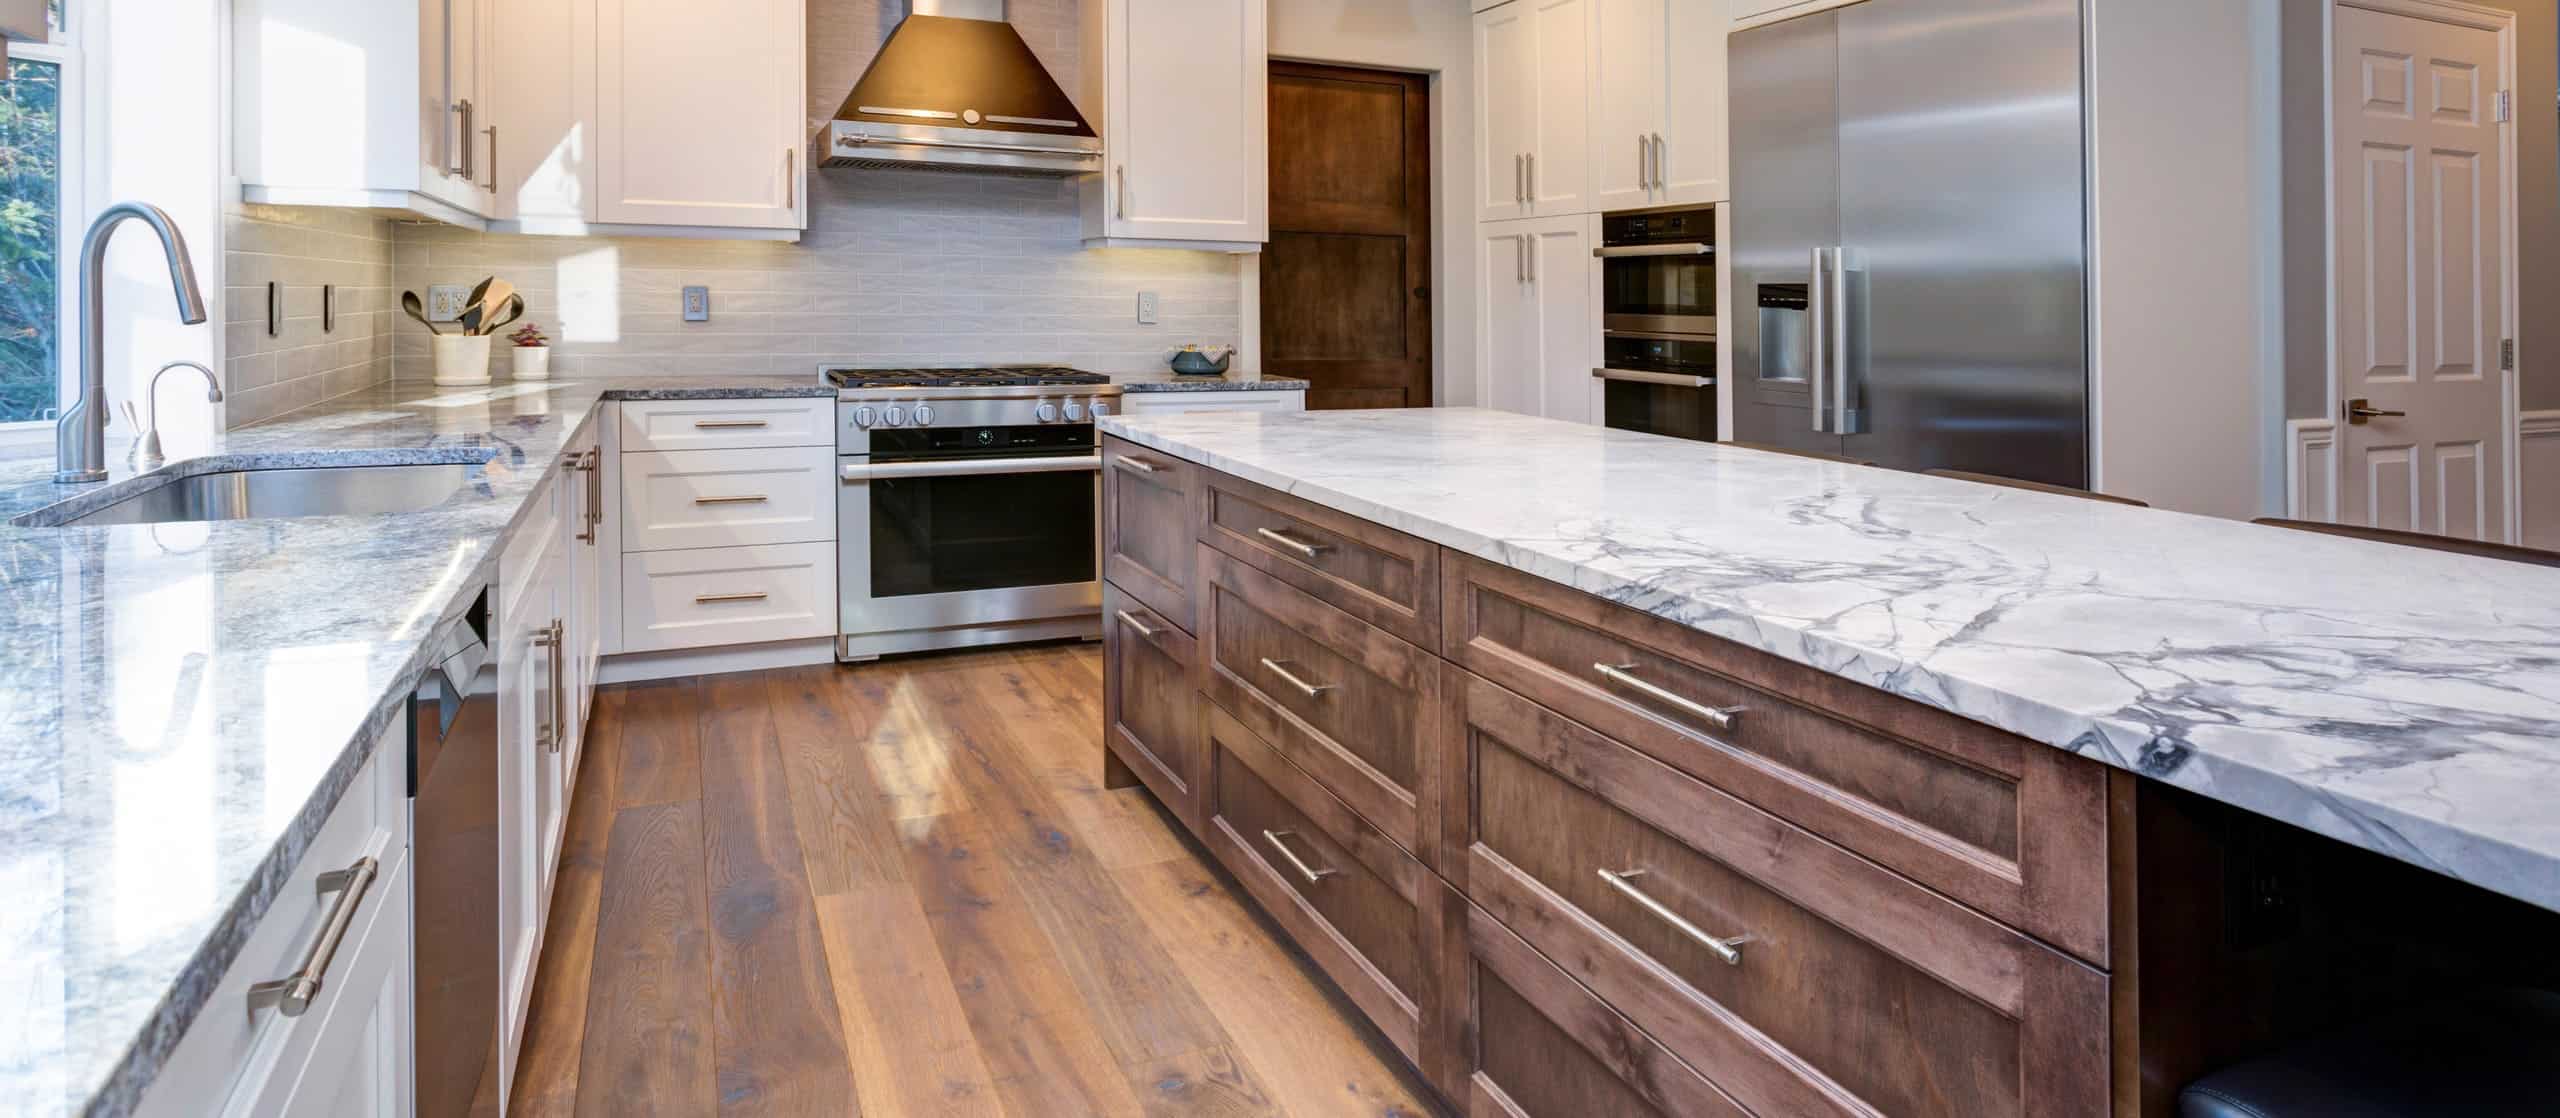
Guide

Tips for Installing Kitchen Cabinets

Kitchen Cabinets

A Brief Introduction to the Cabinet Installation Process

Installing kitchen cabinets can be an expensive part of any kitchen renovation. One way to save money on your next remodel is to install cabinets on your own. It doesn’t matter if you’re a professional carpenter or a passionate DIYer – installing kitchen cabinets doesn’t need to be difficult or overwhelming. True Position Tools founder (and former professional cabinet-maker) Tad Lostlen worked with us to put together this quick overview of things to keep in mind when installing cabinetry.

Note that these instructions pertain to face frame cabinets, not frameless Euro-style cabinets, which would require a different cabinet installation process. In this instance, we’ll also be focusing on wall-to-wall cabinet installation, which can differ from U-shape and other designs. This overview is in no way meant to be an exhaustive how-guide, but a brief introduction to the process of cabinet installation.

*In this example, we’ll be starting with the cabinet bases, but there’s no right or wrong way to install cabinets. If you feel more comfortable starting with the uppers, go for it. 

Some things you may need:
Pencil
Measuring Tape
Stud Finder
Drill
Level
Screws & nails
Caulking
Panel Adhesive
Plans/Drawings
1×3 cleats
Hole saws
Table saw (recommended method for cutting Cabinet Filler)
Chop saw (recommended method for molding)
All cabinet components

Optional:
True Position Tools Cabinet Hardware Jig
Cabinet Plumbing Jig

How to install kitchen cabinets
How to install kitchen cabinets. Photo courtesy Corin Weis/@alaskanguru

How to Install Kitchen Cabinets

Step 1 - Take Stock of All Materials & Remove Doors/ Drawers/Shelving from Cabinets

Perhaps the most important step of cabinet installation is one of the most basic: taking stock of your materials. It’s incredibly common for big-box manufacturers to send incorrect or missing cabinet parts, which can throw your entire cabinet installation into chaos. To prevent this, take time to property count, inspect, and ensure that all of your needed components (cabinets, fillers, toe skins, moldings, other remaining panels and skins) are present and accurately match your planned layout.

Organize and label cabinetry
Organize and label cabinetry. Photo by Duane Hurley/@duanehurley

Next, you’ll want to remove the doors, drawers and shelving so that they are easier to maneuver for installation. Be sure to keep track of your hardware so you have all of the pieces you need when you put them back together once installed.

Remove cabinet fronts
Remove drawers and cabinet fronts for installation. Photo courtesy Corin Weis/@alaskanguru

Step 2 - Mark Cabinet and Appliance Layout on Kitchen Wall

Referring to your drawing and using a pencil, mark the anticipated location of each cabinet on the correct kitchen wall. Note the width and height to confirm that all of your pieces will fit as planned. Since this brief guide assumes that your cabinets are already built, it’s important that you have the dimensions of each of the cabinets and where you plan for them to fit in relation to your appliances, etc. Don’t forget to include markings for the appliances when marking the layout on the wall.

Cabinet layout
Compare the shelves you have on-hand to your cabinet layout to make sure you have everything you need. Either mark your wall or hang the layout on the wall for easy reference. Photo courtesy Duane Hurley/@duanehurley

We recommend making notes on the wall regarding where each specific cabinet (with shelves, drawers, etc.) will fit as to avoid confusion as you move through your own cabinet installation process.

It is unlikely that your cabinet length is the exact size of your wall space. You’ll be using cabinet filler strips to fill the space between the wall and the cabinet. The industry best practice is to factor fillers into your layout, rather than waiting until your cabinets are installed.

In case you’re early in the design phase and reviewing this article to better understand the process, you can determine how much filler you need by using your total wall dimension MINUS your total cabinet dimension. Divide the total remaining space on either side of your cabinets before starting to mark your cabinet locations. In some situations, the fillers will be larger on one side or the other depending on your layout. For instance, if you have a drawer in a corner, you may want more filler in that area to ensure the opposing drawer will clear the handle.

Step 3 - Locate Wall Studs

The next step to installing kitchen cabinets is to locate the studs in your kitchen walls. Using either a stud finder or a nail, confirm and make note in pencil of where your studs are located. These are the areas in which you will be marking inside the cabinet to drill a hole for the screw.

Step 4 - Identify Your High Spots

No floor is completely level. Find the high point of your floor and measure the height of your cabinet from there. This will be the spot where you will create the level line for the remaining cabinets.

Level cabinets from the highest point.
All of your cabinets will level to the highest point. Photo courtesy Duane Hurley/@duanehurley

PRO TIP

Align your cabinet to the high spot and shim to your level line but don’t attach. Instead, level it and use your level line from there for all other cabinets. You will likely need to continue the level and shimming process for each cabinet to ensure they are all perfectly aligned.

Step 5 - Cut Plumbing and Electrical Outlets

When installing kitchen cabinetry, it’s likely you’ll need to cut openings for plumbing and electrical on at least one of the back panels of your cabinets. Using the layout marks on your wall, you’ll want to measure the location of those pipes and electrical openings and transfer them to the back of the cabinet that will be installed over them. Be sure to reverse the markings to ensure that you cut in the correct location. (As an example, if the pipe is located 12” over and 12”  down from the LEFT cabinet mark on the wall, you will want to mark 12” over and 12” down from the RIGHT BACK SIDE of the selected cabinet to ensure that the hole is located correctly.

Sink cabinet plumbing
Transfer the location of your sink plumbing to the back of your sink cabinet. Photo courtesy Duane Hurley/@duanehurley

PRO TIP

Installing cabinets over plumbing and outlets can be one of the most frustrating parts of cabinet installation. That’s why we designed our new Cabinet Plumbing Jig to help locate and mark plumbing and electrical openings quickly and easily. Check it out here

Cabinet Plumbing Jig

Step 6 - Install Base Cabinets

Always start at one end of the wall or corner and continue in order, rather than jumping from spot to spot. Shim and level up on to your high point, noted above. Screw together the bases but DO NOT screw into the wall studs until all cabinets are screwed together.

PRO TIP

Sometimes a temporary screw is helpful to get cabinets to cooperate during installation. In this case, you’ll secure cabinets together with screws before completely installing. Use a level as you go to ensure they are plumb level and on layout.

Step 7 - Install Filler Strips

As noted in Step 2, there will be space on each side of your cabinets that you will need to fill with cabinet filler strips. Measure, mark and cut your filler strips to fill the voids left on each side of your cabinet installation. The cleanest way to do this is with a table saw, using extreme caution and using a push stick when possible.

Use a table saw to cut filler strips to the appropriate size. Photo courtesy Corin Weis/@alaskanguru

Step 8 - Attach Base Cabinets to Wall Studs

After verifying that all cabinets are straight, level and plumb, it’s time to attach the base cabinets to the wall studs. The more cabinets you can attach together BEFORE screwing them into the wall, the better. This will allow for greater flexibility and ease in making fine adjustments. 

Use shims between the wall and cabinet as needed and secure the cabinets to the wall. Usually an inch of screw penetration into the stud is enough. Use caution, as there are wires and plumbing running through stud walls.

Step 9 - Install Your Upper Cabinets

As noted in the introduction, there is no right or wrong way to install your kitchen cabinets. We started with the base cabinets, but you would also begin here with your upper cabinets if you feel more comfortable.

If the tops of your uppers touch your ceiling, be sure to leave space for moldings after the cabinet installation.

If the tops of your uppers do not touch the ceiling of your kitchen, consider spacing the bottoms of the uppers approximately 19.5″ above your base cabinets.

Leave space for crown molding installation.
Leave space for crown molding installation. Photo courtesy Corin Weis/@alaskanguru

If you’re using a backsplash, you will want to install a temporary cleat against the wall to support the cabinet during installation. If you’re not using a backsplash, this process may cause too much damage to your wall, so proceed accordingly.

Once you have installed the cleat, place your cabinet on the cleat and use a stick to support the front weight of the cabinet. Ensure that it is level and install it into the wall stud. You do not need to attach the uppers together first, as recommended with the bottom cabinet sets.

Attach your additional upper cabinets together and to the wall.

Use cleats and a pole to prop your upper cabinets in place for installation. Photo courtesy Corin Weis/@alaskanguru

Step 10 - Finishing

Finish installation with cabinet hardware
Finish installation with cabinet hardware. Photo courtesy Corin Weis/@alaskanguru

If you plan to install crown molding (optional), this is the time to do it. After installing, caulk the areas where the cabinets meet the walls to ensure a clean seal. 

Putty any nail holes with matching putty.

Next, install your doors and drawers, taking time to level and adjust as needed. 

Lastly, install your cabinet hardware (pulls, knobs, etc). 

PRO TIP

For fast and easy cabinet hardware installation, try our Cabinet Hardware Jig. It takes the guesswork out of creating consistently placed cabinet hardware holes. Check it out here

TP-1934 Cabinet Hardware Jig Handle Installation on Modern Slab Door

We hope this brief overview of cabinet installation was helpful. Check out our other tips and guides in the “Learn” section of our website.

Here to help,

James Lostlen, Director
True Position Tools

James Lostlen, TPT Director

ORIGINAL

$199
  • Fast, accurate hardware installation in seconds
  • Any door & drawer + hardware up to 12”

PRO

$249
  • All features of the Cabinet Hardware Jig ORIIGNAL, plus:
  • Rapid drawer front centering and quick repeatable door settings.
Most popular

PRO MAX

$299
  • All the features of the Cabinet Hardware Jig PRO, plus:
  • Hardware up to 38" (965mm) and Shelf Pins with 32mm spacing

People Are Also Reading